Setting the Camera IP Address
Setting the IPv4 Address
- Log in to the camera web system (https://Camera IP address).
- Choose Configuration > Network > Network Parameters > TCP/IP > IP address.
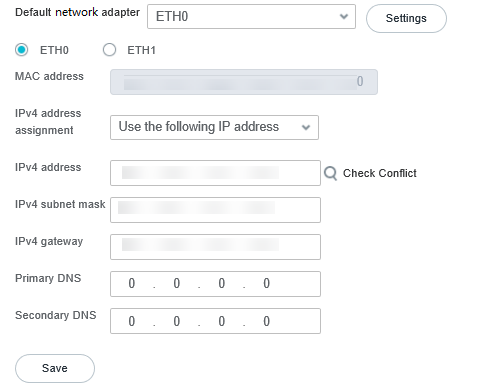
The page shown in Figure 4-3 is displayed.
- Set the camera IP address as planned. Table 4-2 describes the parameters.Table 4-2 IP address parameters
Parameter
Description
Default network adapter
Default network adapter. The options include ETH0 and ETH1, which can be selected from the drop-down list box. After selection, click Settings. Then you need to click ETH0 and ETH1 and set IP addresses for them separately.
MAC address
Camera MAC address. This parameter is read-only.
IPv4 address assignment
Method for obtaining the IPv4 address. The options are Obtain IP address automatically and Use the following IP address. The default value is Obtain IP address automatically.
NOTE:When a Dynamic Host Configuration Protocol (DHCP) server exists in the network, an IP address is automatically allocated to the camera. You can select Obtain IP address automatically to check the IP address.
IPv4 address
Camera IP address. This parameter is available only when IPv4 address assignment is set to Use the following IP address.
IP addresses starting with 127 are invalid. You must enter an IP address starting with another value that ranges from 1 to 223.
NOTE:You can click the magnifier icon to check whether the current IP address is available.
IPv4 gateway
Gateway IP address of the network where the camera is located. The default value is 192.168.0.1.
IPv4 subnet mask
Subnet mask of the network where the camera is located. The default value is 255.255.255.0.
Primary DNS
Primary DNS IP address. The default value is 0.0.0.0.
Secondary DNS
Secondary DNS IP address. The default value is 0.0.0.0.
Setting the IPv6 Address
The IPv6 address is numbered in hexadecimal notation and is divided into eight blocks by colons (:). Each block contains 16 bits, for example, fe80:0da8:65b4:05d3:1315:7c1f:0461:7847.
The following assumes that the local computer is directly connected to the camera. To set the IPv6 address, first change the local computer IP address to be on the same network segment as the camera IP address.
- Set the IPv6 address of the local computer.
- Run the regedit command on the local computer, choose HKEY_LOCAL_MACHINE > SYSTEM > CurrentControlSet > services > TCPIP6 > Parameters, delete DisabledComponents, and restart the computer.
- On the computer, choose Control Panel > Network and Internet > Network and Sharing Center to access the Network and Sharing Center page.
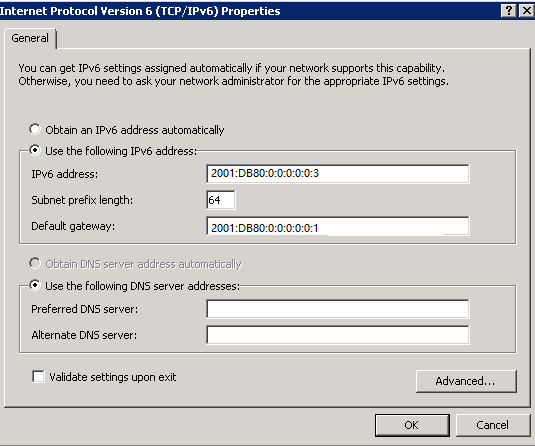
- Click Local Area Connection. In the dialog box that is displayed, click Properties. In the dialog box that is displayed, double-click Internet Protocol Version (TCP/IPv6) Properties. In the displayed dialog box shown in Figure 4-4, change the computer IP address, subnet mask, and default gateway IP address to ensure that the computer IP address is on the same network segment as the camera IP address. For example, set the IPv6 address to 2001:DB80:0:0:0:0:0:3.
- Set the camera IPv6 address.
- Log in to the camera web system and choose Configuration > Network > Network Parameters > TCP/IP > IP address.
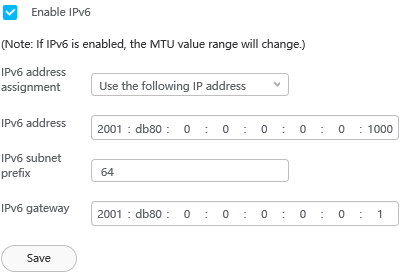
The area shown in Figure 4-5 is displayed.
Table 4-3 IP address parametersParameter
Description
IPv6 address assignment
Method for obtaining the IPv6 address. The options are Obtain IP address automatically, Use the following IP address, and Route advertisement.
NOTE:If the MTU value is less than 1280, the MTU value will change to 1500 after the IPv6 address is enabled. If the MTU value is greater than 1280, the MTU value remains unchanged after the IPv6 address is enabled.
IPv6 address
Camera IP address.
IPv6 subnet prefix
IPv6 subnet prefix of the camera. Set the parameter to 64.
IPv6 gateway
IPv6 gateway address of the camera. Set the parameter to 2001:DB80:0:0:0:0:0:1.
- Enter the camera IP address in the address box of the browser and press Enter. The camera login page is displayed.
- Log in to the camera web system and choose Configuration > Network > Network Parameters > TCP/IP > IP address.